

Turning your garage into a stylish and useful space is easier than you think. Our DIY guide helps you install garage floor tiles easily. This way, you can make your space look better and work better. With many garage flooring options, you can pick patterns and designs that show off your style and last a long time.
Want a classic checkerboard or a unique color stripe? Installing garage tile flooring is easy and flexible. You don’t need special tools; just a few basic ones will do. Our guide takes you from picking the right tiles to finishing touches, making your garage floor look great and last long.
Key Takeaways
- Installing garage floor tiles can make your home look better and increase its value.
- Choosing the right tiles makes your garage floor project fun and rewarding.
- Our guide gives you the steps to install garage floor tiles the right way.
- Find the best garage flooring options that fit your style and garage needs.
- Learn how to prepare the surface for a durable and lasting garage tile floor.
Preparing Your Garage for a Flooring Makeover
Starting a garage floor installation means getting your garage ready first. This step is crucial to make sure the new flooring fits well, lasts longer, and looks great. We’ll go over the key tasks to get your garage floor ready, from cleaning to fixing any issues.
Cleaning and Leveling: The Key to a Solid Base
To get your garage floor ready, start with a clean surface. It’s important to remove all debris, oils, and stains to help the flooring tiles stick well. Sweep and wash the floor thoroughly to prepare it for the next steps. Then, make sure the floor is level. An uneven floor can cause tiles to crack or buckle later.
Visual Floor Inspection: Addressing Cracks and Unevenness
Before installing new flooring, check the floor carefully. Look for any cracks or uneven spots and fix them. This step helps prevent damage and makes sure the tiles fit well and look good.
Gather Your Tools: What You’ll Need for a Successful Installation
Having the right tools is key for a smooth garage floor installation. Here’s a list of the tools you’ll need and what they’re for:
Tool Purpose Rubber Mallet or Dead Blow Hammer For tightly fitting the tiles without damaging them Tile Saw or Utility Knife To cut tiles for edge and corner fittings Tape Measure To accurately measure the layout and tile placement Safety Gloves To protect hands during cutting and installation
Having these tools makes installing your flooring tiles easy and safe. Good preparation makes the installation go smoothly and improves the final look of your garage floor.
Choosing Your Style: Selecting the Best Garage Floor Tiles
Renovating your garage means picking the right flooring is key. It affects both how your space looks and works. Whether you love cars or organize your workshop, the right garage tiles can make a big difference. Let’s look at materials and design tips to help you choose.
Material Pros and Cons: PVC vs. Rubber vs. Plastic
Each garage floor tile material has its own benefits. PVC tiles are known for being tough and resistant to chemicals. They’re perfect for garages used for car work. They’re also easy to clean and come in many colors and patterns.
Rubber tiles are great because they’re durable and soft underfoot. They’re good if you’re in your garage a lot. They also have good grip, which is important to prevent slips and falls.
Plastic garage floor tiles are easy to put in and light to carry. They’re a good choice if you want a simple garage floor solution.
Design Considerations: Patterns and Colors to Transform Your Space
Choosing the right colors and patterns is just as important as the material. The right design considerations can turn your garage into a standout feature of your home. You can match your garage to your home’s style or show off your unique taste with different colors and patterns.
With garage tile options from modern to bold, you can make your garage both stylish and useful. Whether you like a classic look or something new, your garage floor can be a key part of your space’s design.
https://youtube.com/watch?v=AxVvKQbiqJ0
In summary, your flooring choice is about finding a balance between looks and function. PVC is easy to clean, rubber is comfy, and plastic is practical. Combine these with good design choices, and your garage will be both stylish and useful. The right tile selection can really change how your garage looks and feels.
Garage Floor Tiles IV Installation: Step-by-Step Process
Installing garage floor tiles can turn an ordinary space into something special. It makes your garage look better and work better. Knowing how to install these tiles is key. We’ll walk you through the steps to make sure your project goes smoothly.
Starting Right: Initial Tile Placement
Begin your garage tile project by placing the first tile at the front left corner. This makes sure all the tiles fit together right. It makes putting in the rest of the tiles easier.
Interlocking Mechanism: Securing Your Tiles
Interlocking tiles are easy to put together. They connect with each other using a peg and loop system. Make sure the loops face outwards as you lay them down. This helps them fit together perfectly.
Working Your Way: Inward and Outward Installation Strategies
Start installing the tiles from the edges and move towards the middle. Use a rubber mallet to tap them into place. Keep your installation even on both sides to avoid gaps.
Don’t forget to leave a small gap around the edges for expansion. This helps the tiles handle temperature changes without damage.

Follow these steps to get a strong and good-looking garage floor. Garage floor tiles improve your space’s look and function. Take your time with these steps for the best results.
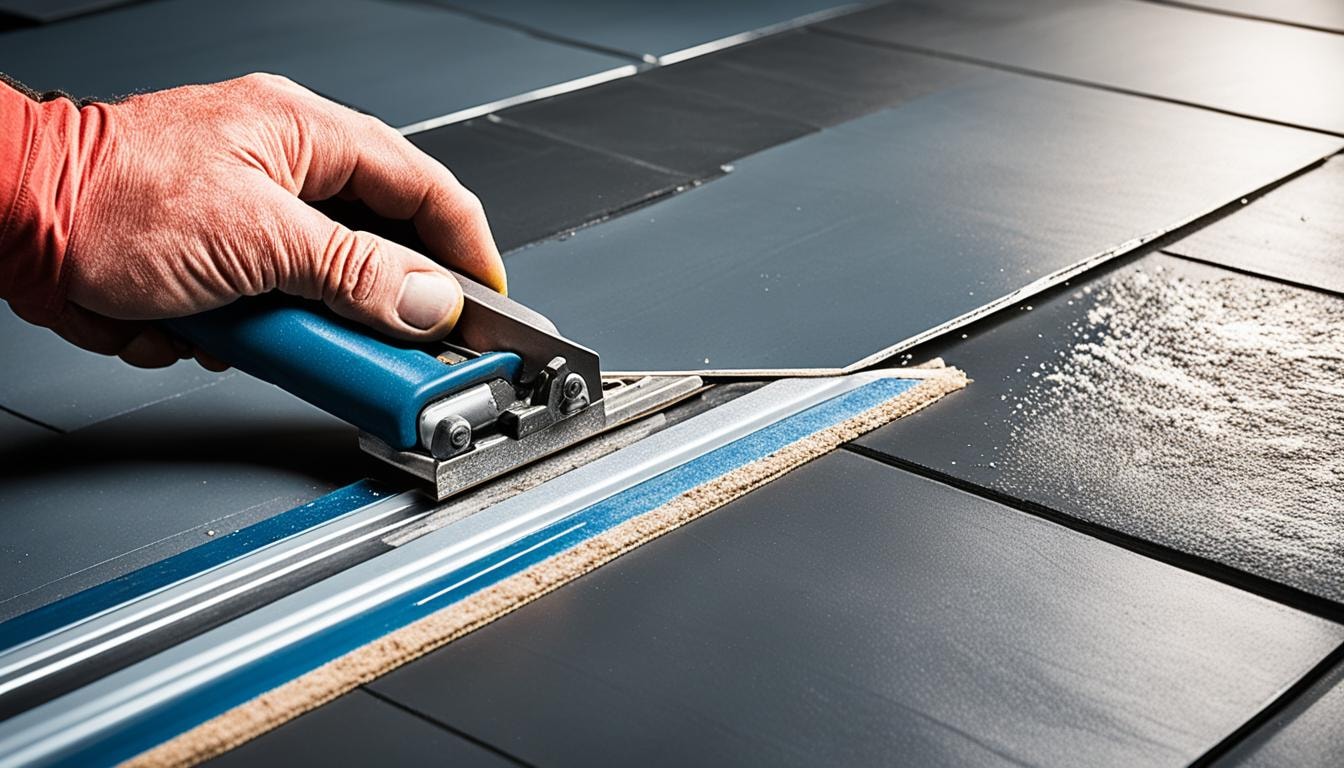
Cutting the Tiles to Fit: Precision and Patience
When you’re installing garage floor tiles, making sure each tile fits perfectly is key. Cutting material with precision is important for looks and durability. Here’s a guide on cutting tiles to fit, the best tools for the job, and tips to make it easier.
Start by measuring the space where the last tile will go. This could be against a wall, around a corner, or next to cabinets or machinery. Use a tile cutter or a utility knife, depending on your tile’s thickness and material.
Tool Best Use Material Type Tile Cutter Quick and precise cuts on PVC and vinyl tiles Solid and rigid materials Utility Knife Flexible cuts, suitable for trimming and custom cuts Softer materials like rubber Jigsaw Complex shapes or curves Any tile material, best with a fine blade
To cut tiles to fit into tricky shapes, mark the backside of the tile for cuts. Place the tile in position, then use a straight edge or square to mark where cuts are needed. Leave a small gap, about 5mm, between the tile and walls or obstacles for expansion.
Practice on a spare tile before cutting the real ones. This helps you get used to the cutting tool, whether it’s a utility knife or a tile cutter. Smooth edges are key for a flawless look. Sometimes, you’ll need an extra hand or a clamping device for big, heavy tiles.
Success in garage floor tile installation comes from precision and patience. Paying close attention to every step ensures your floor looks professional and lasts long.
Finishing Touches: Adding Edges and Expansion Joints
As we finish our garage floor tiles project, we focus on the final touches. These include adding garage floor edges and expansion joints. They’re key for keeping the floor looking great and lasting long, especially with temperature changes.
Expansion For Comfort: Managing Temperature Fluctuations
Managing temperature changes is key to a long-lasting garage floor. Expansion joints help with this. They let the tiles expand and contract without buckling or cracking.
This is crucial in places where the temperature swings a lot. By adding joints along the garage side, your floor can adjust easily to temperature changes.
Edge Pieces: Final Touch for a Professional Look
Edge pieces are a must for a smooth look around your garage floor. They finish the edges and protect the tiles from damage. Here’s how edge pieces make a big difference:
Installation Feature Functionality Appearance Enhancement Garage Floor Edge Installation Protects the boundary tiles Provides a clean and polished finish Expansion Joints Allow for thermal expansion Maintains overall structural integrity
By adding these features carefully, we make sure the floor stays flexible and looks great. With the big impact of temperature changes, it’s crucial to install these features well. This makes the floor professional-looking and long-lasting.
Maintenance Tips: Keeping Your New Floor in Top Condition
After installing your garage floor yourself, it’s key to learn how to clean and maintain garage tiles. This keeps them looking great and lasting longer. Here are some important tips to keep your garage tile flooring in top shape.
Start by sweeping or vacuuming regularly to get rid of dirt and debris. For a deeper clean, use a mild detergent in warm water to mop. This keeps your tiles clean without damage. Always clean spills quickly, especially oil or chemicals, to prevent stains.
- Avoid using harsh cleaners or abrasive tools that could damage your garage tile flooring.
- For stain removal, use cleaners made for your tile type.
- Consider using a doormat to reduce dirt tracked into your garage.
Regular maintenance keeps your garage floor looking good and boosts your home’s value.
Easy installation and long-term maintenance are big pluses of DIY garage floors. With these tips, your floor will stay new and strong for many years.
Conclusion
We’ve shown you how to easily upgrade your garage with the latest flooring options. We covered preparing your floor and picking the right coating for a lasting finish. Our goal is to give you the knowledge to make your garage look better and work better for you.
Every step in the installation process makes your garage better. It becomes a place for parking, working out, or just having fun. The flooring we recommend lasts a long time and stays looking new with a little care.
Choosing the right flooring is key to a great garage makeover. It’s where style meets practicality. We aim to make upgrading your garage easy and effective.
We hope our guide helps you create a garage you’re proud of. It’s a place that looks good and works well for years. For people in the UAE, this is a great way to improve your property. It shows off your style and the innovative spirit of our region.
FAQ
How do I prepare my concrete garage floor for tile installation?
Start by cleaning the concrete floor well to remove dirt, grease, or debris. Make sure the floor is level by filling holes and cracks with a repair compound. Remove any high points or loose parts that could affect the floor’s flatness. Check for and fix any moisture issues.
What tools will I need to install garage floor tiles?
You’ll need a rubber mallet or dead blow hammer, a tile saw or utility knife for trimming, a tape measure, and safety gloves. Having a chalk line for proper alignment is also good if you’re using interlocking PVC tiles.
How do I choose the best garage floor tiles for my needs?
Think about what you’ll be doing in your garage. PVC tiles are great for automotive work because they’re chemical-resistant and easy to clean. Rubber tiles offer excellent grip and are very durable, perfect for heavy-duty use. Plastic tiles are budget-friendly and easy to install. Also, consider the colors and patterns that match your space and style.
Can I install garage floor tiles myself?
Yes, you can! Garage floor tiles are designed for DIY installation. They use an interlocking system that makes it easy. Just lay and connect the tiles as the manufacturer says. With just a few tools and no special skills, you can get a professional-looking floor.
What should I do if my garage floor tiles don’t seem to fit perfectly along the walls or around corners?
If your tiles don’t fit well against walls or around corners, you’ll need to cut them. Measure the space and mark the tile with a straight edge. Cut the tile with a tile cutter or utility knife for a perfect fit. Don’t forget to leave a small gap along the walls for expansion.
Do I need to use edge pieces and expansion joints for my garage tile floor?
Yes, use edge pieces for a neat look and a smooth transition to other flooring. Expansion joints are crucial for temperature changes, preventing the floor from buckling. They’re key in large garages or where tiles face direct sunlight.
How do I maintain my new garage floor tiles and keep them looking great?
Keep your tiles clean by sweeping or mopping regularly. Clean spills right away to prevent stains. Use cleaners recommended by the tile maker for deep cleans. A mild detergent or a cleaner made for your tile type can also help keep them looking good.
Are there any special considerations for installing tiles in front of the garage door?
Yes, tiles near the garage door face direct sunlight when the door opens, causing expansion. Installing expansion joints here helps with temperature changes. Start laying tiles away from sunlight to let them adjust first.
Source Links

Affordable Anti Skid Tiles Pricing Guide
Best Garage Floor Tiles RI: Durable & Stylish Options